How to Photograph Bell Towers at Golden Hour Without Distortion
A bell tower is the most honest subject in architecture photography. It has no facade to flatter it and no garden to soften it. Point a camera at one and any error in your position shows up at once: the campanile leans back, the belfry narrows, the whole thing looks about to topple. Warm light will not rescue bent verticals. Get the geometry right, though, and a tower stops looking like a building and starts looking like a landmark.
Here is how to do both at the same time — straight lines and the low, honeyed light that stone and brick seem made for.
Why Bell Towers Bend
Every converging vertical you have ever seen in a tower photograph has the same cause. The camera was tilted up. When the lens axis points above the horizon, the sensor plane is no longer parallel to the tower's face, and perspective does what perspective does: lines that are parallel in reality converge in the frame. The top of the tower sits further from the sensor's centre, so it records smaller. The building appears to lean backwards.
With a 60-metre campanile shot from 30 metres away, the top sits roughly 45 degrees above you, and you must tilt the camera steeply to include it. From 300 metres, the same tower occupies only about 11 degrees of upward angle. Same building, same lens, far less distortion — because you barely tilt at all. That single relationship governs everything that follows.
The fix is not software. Correcting keystoning in an editor stretches the upper part of the frame, and a tower is exactly the wrong shape to stretch: the belfry arches go oval, the finial smears, and the bricks begin to look soft. Do the work with your feet and your lens, and leave the editing for the last five per cent.
Stand Back, Then Stand Higher
Distance is the first tool. Walk away until you can frame the whole tower with the camera level, or nearly level. Sometimes that means the far side of the piazza; sometimes it means the opposite bank of the river or the end of the street two blocks down. Accept that you will be photographing through more air, more wires and more street furniture. You can crop later; you cannot un-tilt.
Elevation is the second tool, and it is underused. If there is a hill, a terraced car park, a hotel balcony or a public tower of your own to climb, use it. From a viewpoint halfway up a neighbouring building, your camera can be level and the tower can still fill the frame. Rooftop car parks are unglamorous and excellent. So are railway footbridges.
In practice, aim for a camera height between a third and a half of the tower's own height, and a distance of at least three to four times that height. Those proportions keep the tilt angle small enough that any residual convergence reads as natural rather than as a mistake.
Choose the Lens for the Job
Two lenses solve this problem in different ways.
The long lens, from far away. A 70–200 mm or a 100–400 mm used at 200 metres or more compresses the tower against the sky or the town behind it, and because the camera stays nearly level, the verticals stay vertical. This is the most reliable method available to anyone with a telephoto zoom, and it produces the calm, slightly flattened look that suits campaniles so well.
The tilt-shift lens. If you have access to one — a 24 mm or 45 mm shift lens is the classic pairing — you can keep the camera level and slide the front element upward to include the top of the tower. The sensor plane never tilts, so the lines never converge. It is a specialised, expensive piece of glass, and it is worth borrowing or renting for a single afternoon if you are serious about architecture.
The panorama workaround
Without a shift lens, you can approximate one. Set the camera level on a tripod, frame the base of the tower, and shoot overlapping horizontal frames as you pan upward, keeping the camera level and rotating only on the tripod head. Stitch the frames into a vertical panorama. Because every frame was level, the stitched result keeps straight sides. You need still air and a static scene — flags and pigeons will betray you — but for a stone tower at dusk it works remarkably well.
Golden Hour Is a Moving Target
Golden hour is not a fixed appointment. It is a description of the sun's angle relative to the horizon, which means it arrives at a different time, from a different direction and for a different duration depending on the season and your latitude.
In summer the sun sets far to the north-west in the northern hemisphere and the warm light lingers; in winter it drops quickly to the south-west and the good light may last twenty minutes. The face of the tower that glows amber in June can be in deep shadow in December. Before you travel, check where the sun will be at the hour you plan to shoot — a compass, a sun-position app or a paper map and a protractor all work. Know which side of the tower you want lit, and choose your standing position to put the sun roughly behind and to one side of you. Raking light reveals the texture of brick and stone; flat frontal light hides it.
Sunrise or sunset?
Both, for different reasons. Sunset gives you a warmer sky and a town that is winding down, and if the tower is floodlit you can stay on into blue hour and photograph it against deep cobalt with a long exposure. Sunrise gives you empty streets, cleaner air and the chance to catch mist settling in the valley behind the belfry. In summer, sunrise is also the only time the square is likely to be free of parked cars and tour groups.
Whichever you choose, arrive early and stay late. The best light is usually in the twenty minutes on either side of the moment the sun clears or touches the horizon, not at the precise minute your app predicted.
Composition Details That Survive Straight Lines
Once the verticals are true, protect them. A few habits make the difference between a technically clean frame and a good one.
Leave breathing room above the finial. Towers look crushed when the cross or the weathervane touches the top edge. Include enough foreground to show the tower's base and a hint of what it stands on — pavement, steps, a café table, a row of parked bicycles. That grounding detail is what tells the viewer the tower is enormous.
Watch the edges. Streetlights, cables, road signs and the corner of a building intruding at the frame edge will undo the symmetry you worked for. Move two steps; the problem usually vanishes.
Use the tower's own geometry. Most campaniles are symmetrical, so place the axis centre-frame or deliberately off-centre, but not almost-centre. If the bell chamber has open arches, wait for the sky to show through them — that detail is often the photograph's real subject.
A Field Checklist
- Arrive forty-five minutes before the light peaks, with the shot already planned.
- Level the camera with a tripod bubble or the in-camera electronic level.
- Keep the sensor plane parallel to the tower face; resist the urge to tilt up.
- Step back until the full tower fits without raising the lens.
- Find height — a hill, a balcony, a footbridge, a car park roof.
- Use a longer focal length from distance rather than a wide lens up close.
- Enable the framing grid and align the tower's edges with it.
- Check the corners for cables, signs and lamp posts before you press the shutter.
- Shoot a bracket: warm light on pale stone can exceed what one exposure holds.
- Note the sun's direction for next season, so you know when to return.
Practise on Your Own Tower
You do not need a trip to Italy to learn this. The parish church tower at the end of your street will teach you everything: how far back you must stand, how much tilt ruins the frame, how the light changes between March and September. Photograph it four times across the year from the same spot, and you will start to see the seasons in the angle of the sun rather than in the leaves.
Then go and find a campanile. Stand further back than feels natural, keep the camera level, and wait for the last of the warm light to reach the top of the belfry. The tower will do the rest.
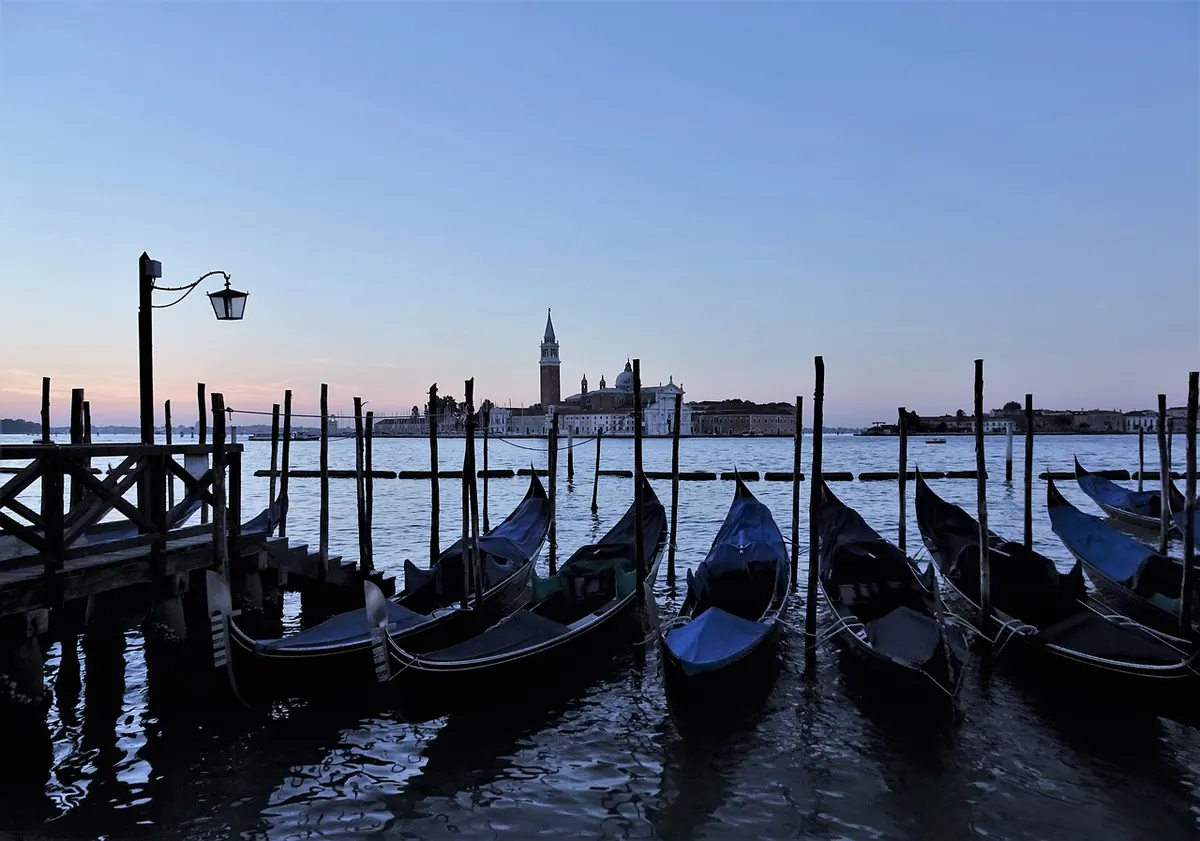
Photo: France58 / Pixabay